

This simple, cozy nightgown sewing project is a favorite throw-on outfit for maximum comfort! Read on for a free sewing pattern and a step by step tutorial to make this comfortable house dress.


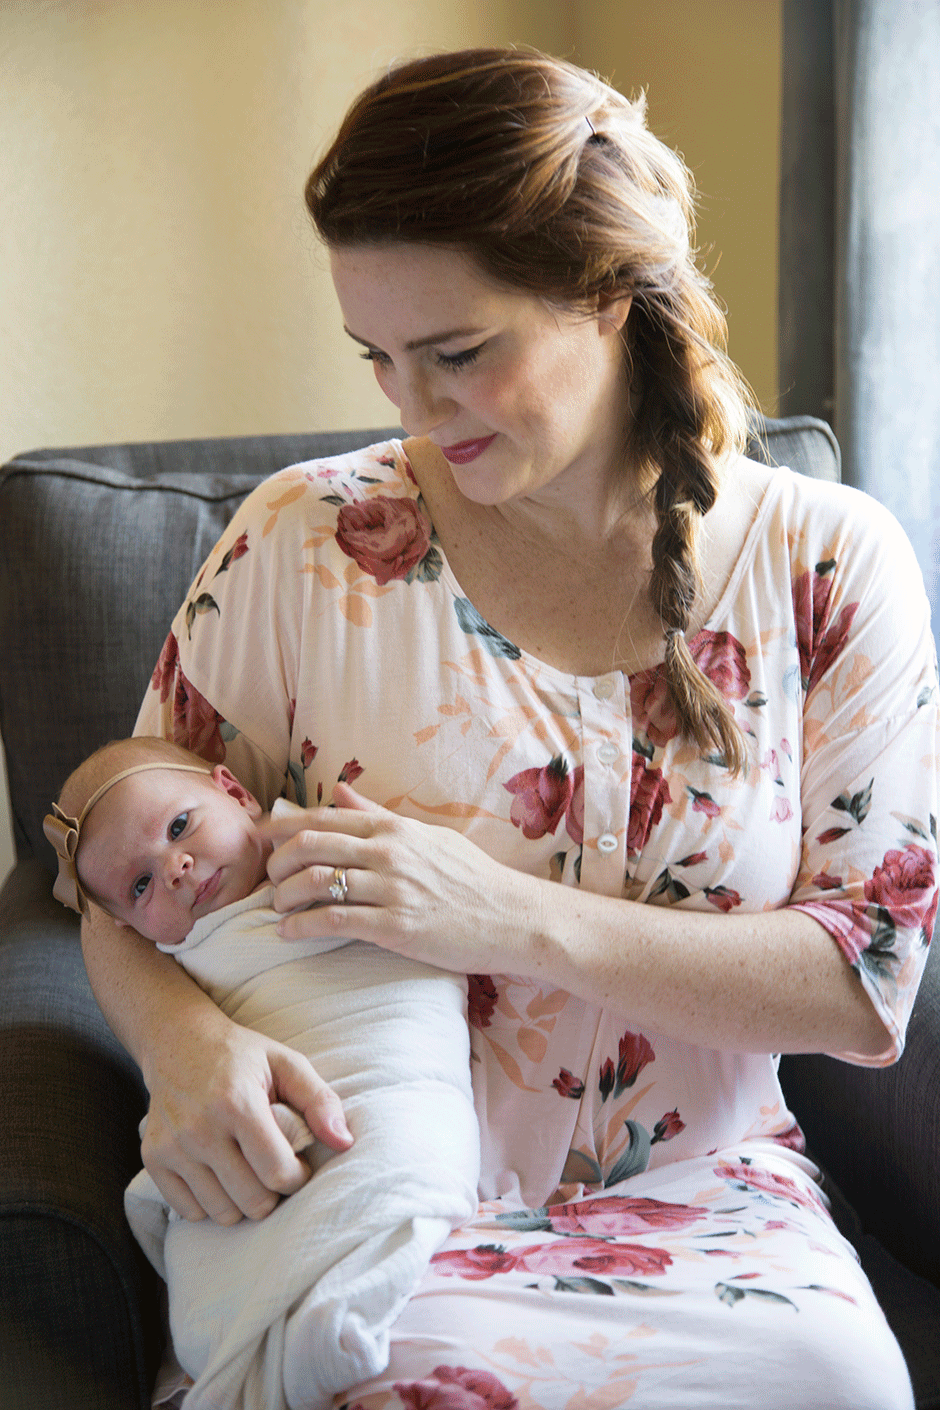


The first few weeks after having a baby are my favorite; it’s the only time you’re allowed to just sit around in pjs all day long, resting, eating whatever you want and snuggling a precious new baby. Life doesn’t get any better! I’m just having a ball loving on this new little girl of ours. Isn’t she precious?
Make sure you check out the New Mama Postpartum Gift Box I curated for that special postpartum period. It’s chock full of my favorite products to help any new mom care for herself. Buy one for yourself or for the expectant mom in your life (p.s. it includes a new nightgown in case you can’t or don’t want to sew one).
Today I’ve got a free tutorial for the perfect postpartum night gown: long, stretchy, lots of coverage and nursing-accessible. Of course you can make one even if you don’t have a new baby, and if you leave off the placket, it’s a super quick project. Pair it with some cozy pajama pants (and maybe even a long sleeve tee!) to make it warm enough for the cooler months.
I did lots of hunting for free nightgown patterns after having my last couple of babies, but I never found just what I wanted: a big, comfy lounge dress that I could make as cute and cozy as I liked WITH the option of adding a placket to make it nursing friendly. So I made my own! I can’t decide what the best part is of this pattern: the big silhouette that works for almost every body? The fact that it works as a day dress just as well as a night dress? Tho optional placket? The big dropped sleeves? Agh! It’s just my very favorite one-of-a-kind nightgown.
NOTE: Want a free pattern for this nightgown? Get it here. It includes just 4 pattern pieces!
Supplies:
2 yards stretch fabric (I always use a very stretchy knit for maximum comfort)
4 matching buttons (if attaching optional placket)
10″ x 10″ piece of lightweight fusible interfacing
coodinating thread & sewing machine
1. Find the stretch of your fabric and fold in half with the stretch running horizontally (perpendicular to the fold). Cut out front and back of nightgown according to diagram (the diagram show just the front bodice being cut out on the fold, but you’ll need to cut out a back as well!). Cut out sleeves and placket also, ensuring that the stretch runs across the width of the sleeves.

2. Lay your front and back pieces on top of each other, right sides together (the fabric’s wrong side will be facing you). Sew a straight line along the shoulder seam and side seams, using a stretch stitch or serger; press seams well.
3. Sew underarm seams of sleeves by folding sleeve in half lengthwise, RST, and stitching along the long raw edge, using a stretch stitch. Press well and repeat with second sleeve.
4. Turn bodice inside out and sleeve right side out. Insert your sleeve into the sleeve opening of bodice (insert narrower opening in first!), matching up raw edges and underarm seam with bodice side seam. Stitch sleeve to bodice using a stretch stitch; press well.
5. Fold under raw edges of sleeves and bodice hem and topstitch using a double needle; press well. You can also choose to leave your sleeves and hem raw since knit doesn’t fray!
6. Create neck facing: Measure the circumference of your neckline and subtract 1-2″ (you want your facing to be shorter than your neckline so that it pulls the neckline taut when sewn together. How much shorter depends on the stretch of the fabric…here I cut mine 2″ shorter that the neckline because my fabric was super stretchy; if your fabric is less stretchy, try making it just 1″ shorter. It’s kind of a trial and error thing.)
Cut out a neck facing measuring 1″ x the length you just calculated (neckline minus 1-2″). Sew short ends of facing, right sides together, to create a loop.
7. Pin facing to neckline, right sides together, stretching facing to distribute evenly around neckline. Stitch facing to neckline using a 1/4″ seam allowance and a stretch stitch, again stretching facing to fit. Press facing & seam allowance away from bodice, and then press raw edge of facing under 1/4″. Fold facing to inside of garment, pressing again. Topstitch facing to bodice, close to folded edge, using a stretch stitch.
This video is a great resource for sewing a knit facing, in case you haven’t done this technique before.
8. OPTIONAL button placket: Cut a rectangle out of the center front of your your nightgown measuring 10″ x 1″. At this point, instead of typing out a really wordy explanation that doesn’t make any sense, I’ll let you learn this step the easy way by watching this video. It’s a great, simple explanation for inserting a placket and the best way I’ve found to work with really stretchy knit. (Note: I used a very lightweight interfacing because I was using a very thin knit fabric…you don’t want to go too much heavier than your fabric).
And voila! A perfectly cozy, comfy, pretty nightgown that’s perfect for lounging with or without a new baby. Don’t forget to grab this free house dress pattern here. It’s got even more instructions in full detail to make this your easiest sewing pattern yet. Put it on your sewing list, ASAP!
A few style variations for this super easy project could include adding ruffle strips or pretty lace to the end of the sleeves and/or hem, shortening it a bit (or changing up the fabric) to make day versions, or even opening up the front all the way down to make it into a robe! So many options for a lovely handmade nightgown.
Side note: if you’re a nursing mom, be sure to check out our podcast episode about breastfeeding here!
14 Comments
Kim Coffin
March 22, 2017 at 10:15 pmYou look amazing! What a great tutorial, I need to make a nightgown. Can’t wait to hold that sweet baby in April!!
DIY Summer Shift Dress • Whisk 'Em
July 5, 2017 at 6:42 pm[…] save yourself the headache of retrofitting this pattern, instead you could use my instructions for this nightgown tutorial to make a dress instead! It’s basically the same shape; you’ll just need to make it a […]
Kristin
July 10, 2017 at 7:30 pmWhat size does this pattern fit. I am 5’7′ and usually a size 4 or small. Should I make any adjustments?
Bonnie
July 10, 2017 at 8:11 pmHi Kristin! This is pretty much a one-size-fits-all pattern, but since you’re on the small side, I’d probably take in a few inches on each side so that you’re not drowning in it. Right now I’m about a size 8 and you can see how it fits me in the pics. Let me know how it turns out!
Kristin
July 15, 2017 at 12:04 amI decided to go with your raglan dress instead and add a button placket instead since I do much better with sided patterns but thank you so much!! Also that pattern was great too!!
Bonnie
July 15, 2017 at 10:41 amOh great! Nothing like a throw-on-and-go summer dress, right??
10 Free Women's Sewing Patterns Perfect for Gifts - Heather Handmade
November 28, 2017 at 5:17 am[…] Nursing-Friendly Nightgown Tutorial – Do you need a gift for a new mom? I would’ve loved this nursing-friendly nightgown to wear with a new baby around. It looks comfortable, cute, and it’s functional. You could choose really pretty fabric to make a mom feel pretty! […]
10 Free Women's Sewing Patterns Perfect for Gifts • Heather Handmade
November 23, 2018 at 6:46 pm[…] Nursing-Friendly Nightgown Tutorial – Do you need a gift for a new mom? I would’ve loved this nursing-friendly nightgown to wear with a new baby around. It looks comfortable, cute, and it’s functional. You could choose really pretty fabric to make a mom feel pretty! […]
Awesome And Cute DIY Nightgowns
January 9, 2019 at 8:18 am[…] Bonnie and Blithe […]
29 Cute DIY Nightgowns and Sleepwear You Can Make Yourself – Life Hacking
January 12, 2019 at 11:44 am[…] bonnieandblithe […]
Rebecca Zirkle
February 10, 2021 at 9:51 pmThe pattern says that it is layered but I don’t see the layers option in Adobe.
Bonnie
February 17, 2021 at 2:55 pmHi Rebecca – they’re there! Make sure you have the latest version of Adobe Acrobat installed in order to see them.
Brent Stuart Ferguson
January 18, 2022 at 7:50 amNot a nursing mother here, but a decent sized man who can sew. I was looking for nightshirt patterns and found your post. It should do for a heavy flannel nightshirt as well, once pockets are added, that is! I do have a question for you, though. Where would you add cloth if you wanted this to fit a pregnant woman (*or a man with abdominal fat), the sides? I was thinking of adding a triangular piece to each side, but perhaps something like an elongated pentagon would do better, so that it doesn’t become a dress?
Bonnie
January 22, 2022 at 7:11 pmGood question! In order to size up in the belly area only, I would add a panel of fabric to the side seam but just gradually ease it larger going from under the arms to the belly. So yes, essentially a triangular piece would work best. You might consider just adding a strip of fabric all the way down the side seam (the same width) and then just take it in where you don’t need the extra room (like under the arms, for example). I recommend practicing with cheap fabric and then when you have a fit you love, take it apart and use that as a pattern piece for another one made of nicer fabric. Good luck!