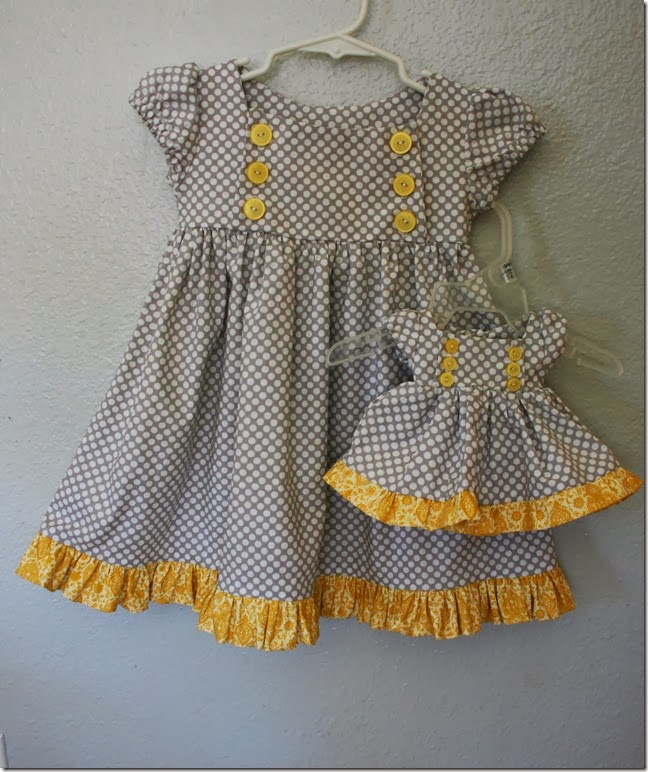
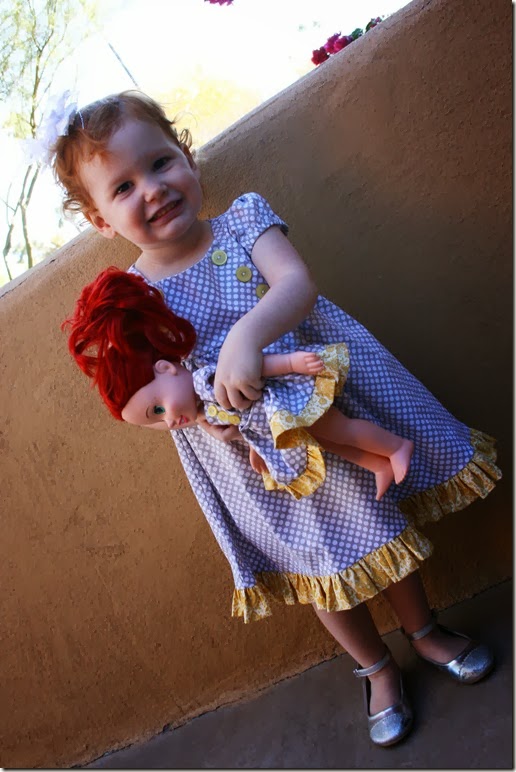
If you’ve been on Pinterest for like 5 minutes, you’ve probably seen or pinned a tutorial from Craftiness Is Not Optional. The blog is as adorable as the writer and she’s got the BEST little girl dress tutorials (and TONS of them!). A friend commissioned me to make CINO’s Junebug dress for her little girl along with a matching version for a baby doll her daughter is getting for Christmas.
Fun right??
I’ve made the Junebug dress before for all 3 of my girls and loved it. It was a fun challenge grading it to a little baby doll size…I haven’t sewn that small since my foray into Barbie fashions in 1992 (yes, I was 12).
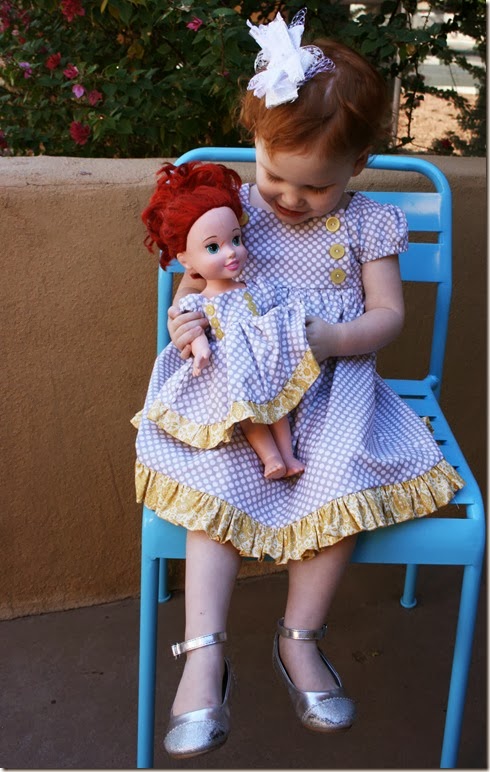
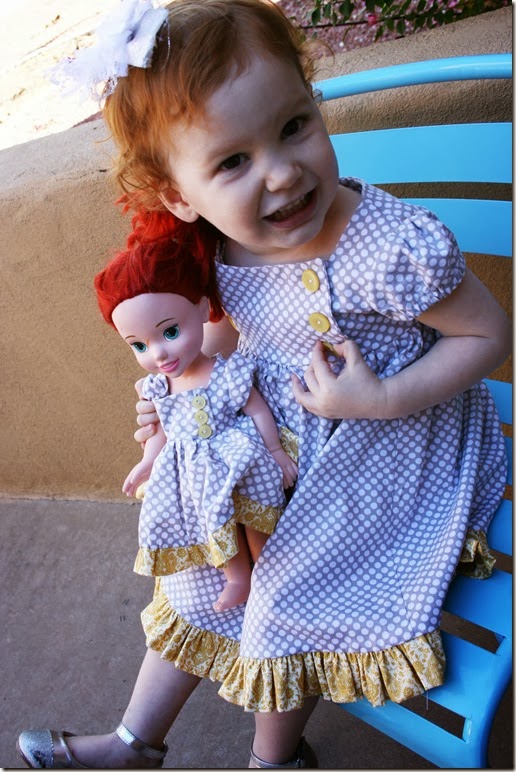
Vivian loved modeling for it too. In fact, I should’ve documented the holy terror she became when I took it off her doll. That must mean she liked it, right??
Click THIS google doc link for the PDF of the doll-sized pattern. This free version on Craftiness is Not Optional’s site is a toddler size 2 but for $10 you can buy this full pattern all the way up to age 8!
Keep reading for how to finish the doll version…
For the skirt, I cut 2 rectangles of fabric, measuring 10” wide and 5” long. Cut them into a slight A-line and sew together. Follow CINO’s directions here for attaching the skirt and hemming it. Or if you want to attach a ruffle like I did, cut a strip of fabric measuring 2.5” wide by at least 35” long. You can go longer for a fuller ruffle but don’t go much shorter. Sew raw (short) edges together to make a big circle, then fold in half lengthwise (so your strip is 1.25” wide) and press, wrong sides together. Gather along the raw edge and sew to skirt bottom, right sides together.
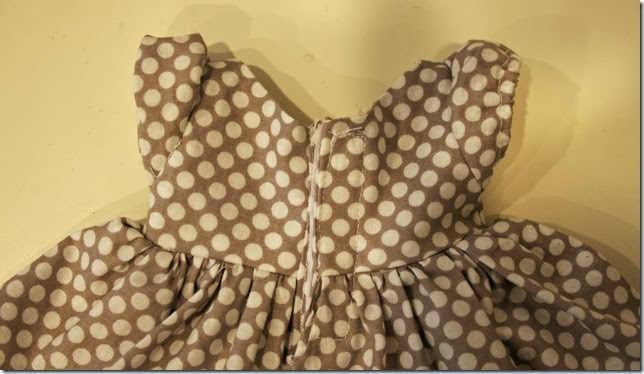
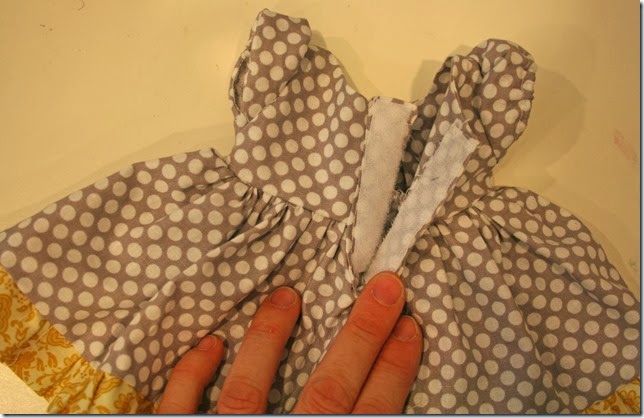
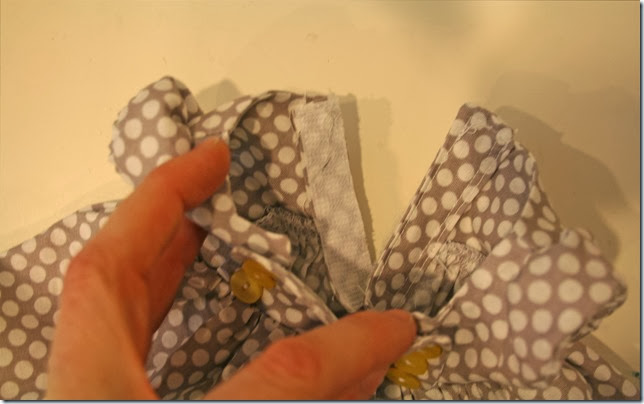
I ended up making a velcro placket on the back for ease of dressing the doll. So don’t be a dummy like me and go crazy making 6 teeny tiny working buttonholes on the front cause they’ll be too small for any toddler to button anyway. Just sew the buttons on through the front flap and and side portion of the bodice so that the flap can’t open.
Cut a slit down the back of the finished dress about 4” long (through the bodice and into the skirt). Then cut 2 placket pieces with the following measurements:
1) 4.5” long x 3” wide 2) 4.5” long x 1.5” wide
Fold #1 in half lengthwise, right sides together (to make piece 2.25” x 3”) and press. Sew 3 sides together, leaving one long side open. Clip corners, turn right side out and press again. You’ll now have a long pocket-like strip with one long opening.
Now pin it to the left side of your doll’s dress opening in the back, right sides together. Sew a small 1/4” seam down the length of the slit, attaching only one side of placket to dress. Fold the other side of placket back around into the inside of the dress and press seam. Now you’ll just have one raw edge left of the placket on the inside. Fold a small 1/4” edge of this raw edge down into the placket and sew closed. Topstitch velcro onto the outside of this placket.
Now take placket piece #2 and sew it, right sides together, to the right side of the back opening. Fold it to the inside of the dress, press and then fold the top and side raw edges of the placket in on itself and stitch those closed. Add velcro to the INSIDE of this placket. Then turn the dress inside out and take the bottom raw edges of each placket and sew them together to close it up. Voila! All done.
I realize that those placket instructions sound much harder than they are. When I get around to making another one, I’ll try to take more step by step pictures but it’s pretty self-explanatory once you get going.
Good luck!


No Comments