

There are so many really fun, easy trends to copy this fall! I’m going kind of crazy trying to decide what to make next from my sewing queue. Tell me I’m not the only one that has like 57 projects on my list to sew??

Kimonos are one of those easy peasy projects that give a lot of bang for the buck: they cover any miscellaneous lumps and bumps, can add warmth if you need it (and don’t live on the surface of the sun, like me) plus that add that little “je ne sais quoi” to an otherwise hum-drum outfit.
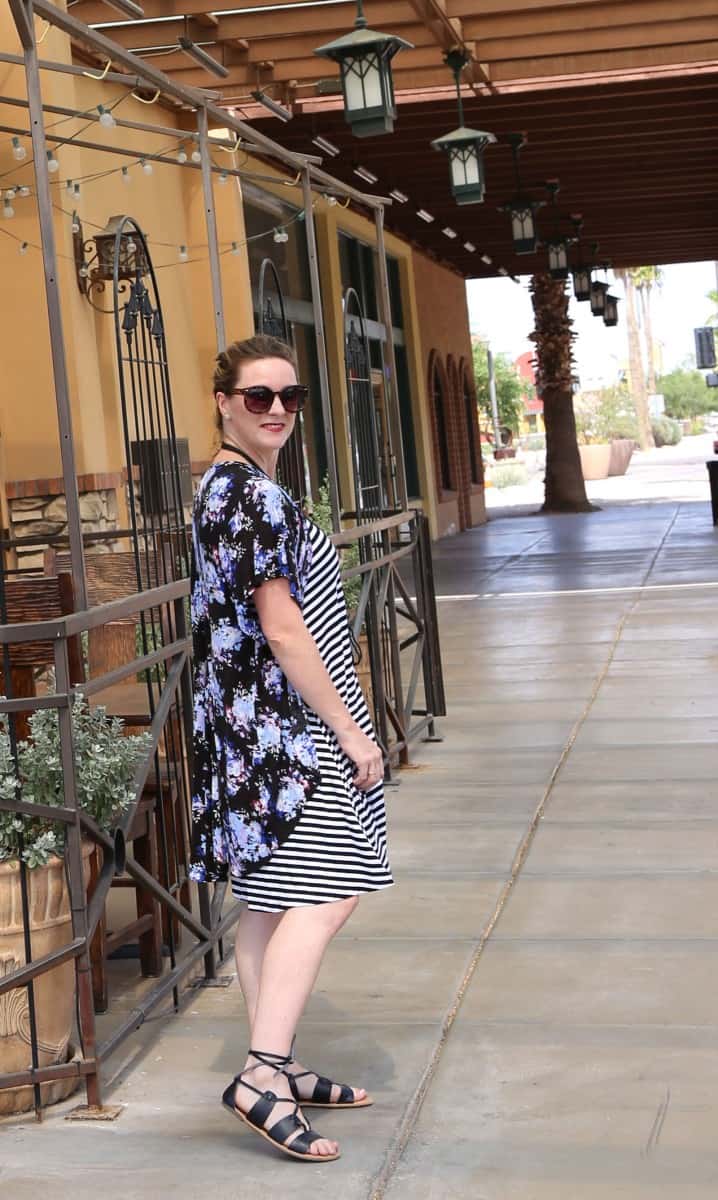
This floral kimono was made from a gorgeous and buttery soft baby hacci knit from Girl Charlee. It was yet another that came from a Knit Fix bag and I couldn’t wait to do something with it!
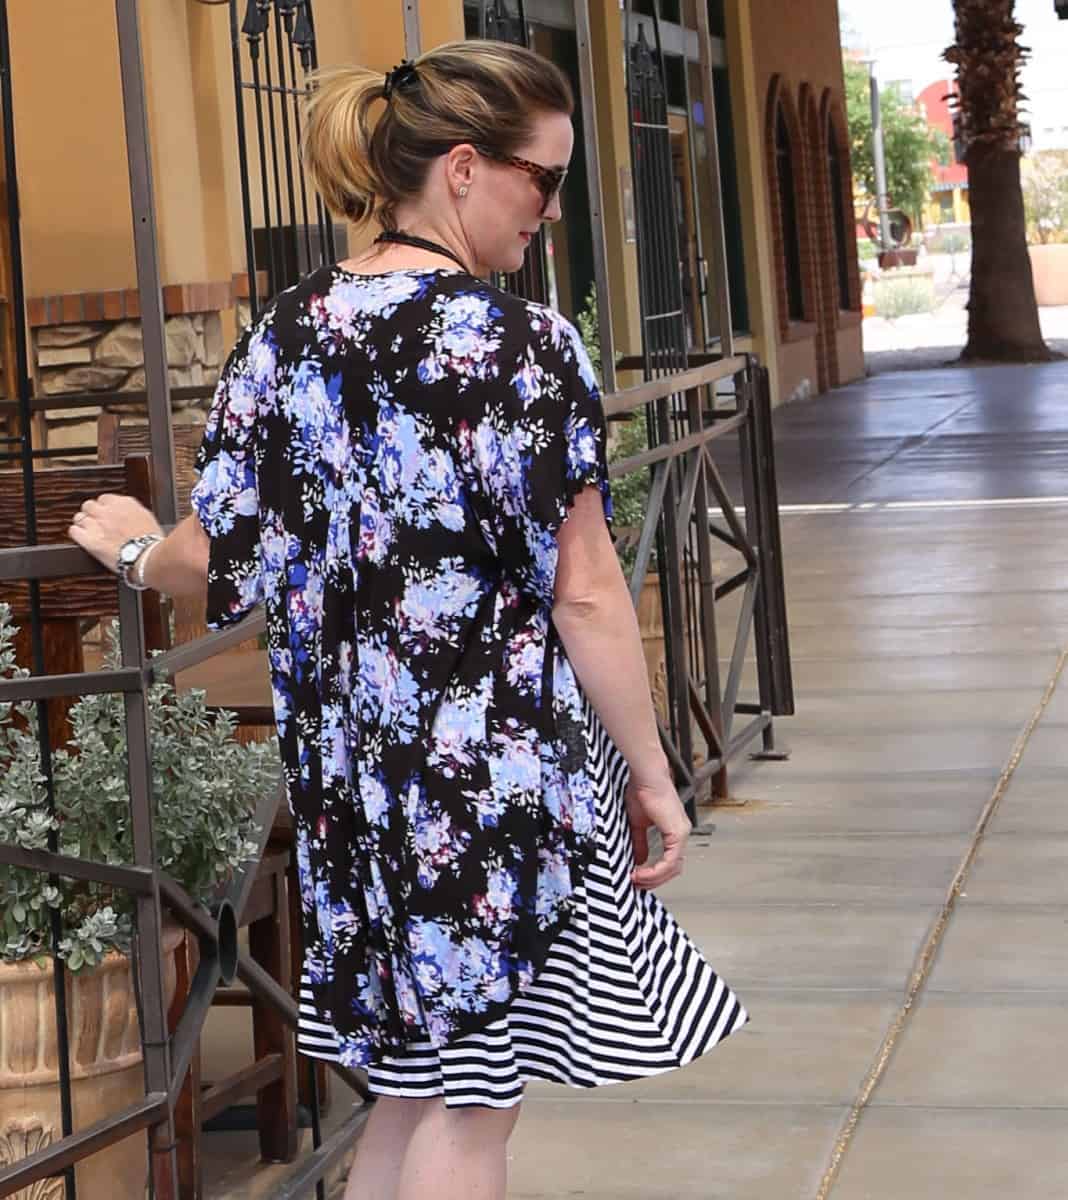
Hacci knit is a sweater knit, but this one is really very thin so it’s perfect for Phoenix. I loosely followed a couple kimono tutorials online (I like this one and this one.) But then I accidentally made it too narrow and didn’t get enough flowiness in the back like I had originally intended. So, I just cut a slit up the back center (from the bottom until about 4″ from the neckline ) and inserted a triangle of extra fabric to give it a fun ripple of movement. Oh, and I totally left all the edges raw…because I CAN.
It’s SO comfy!
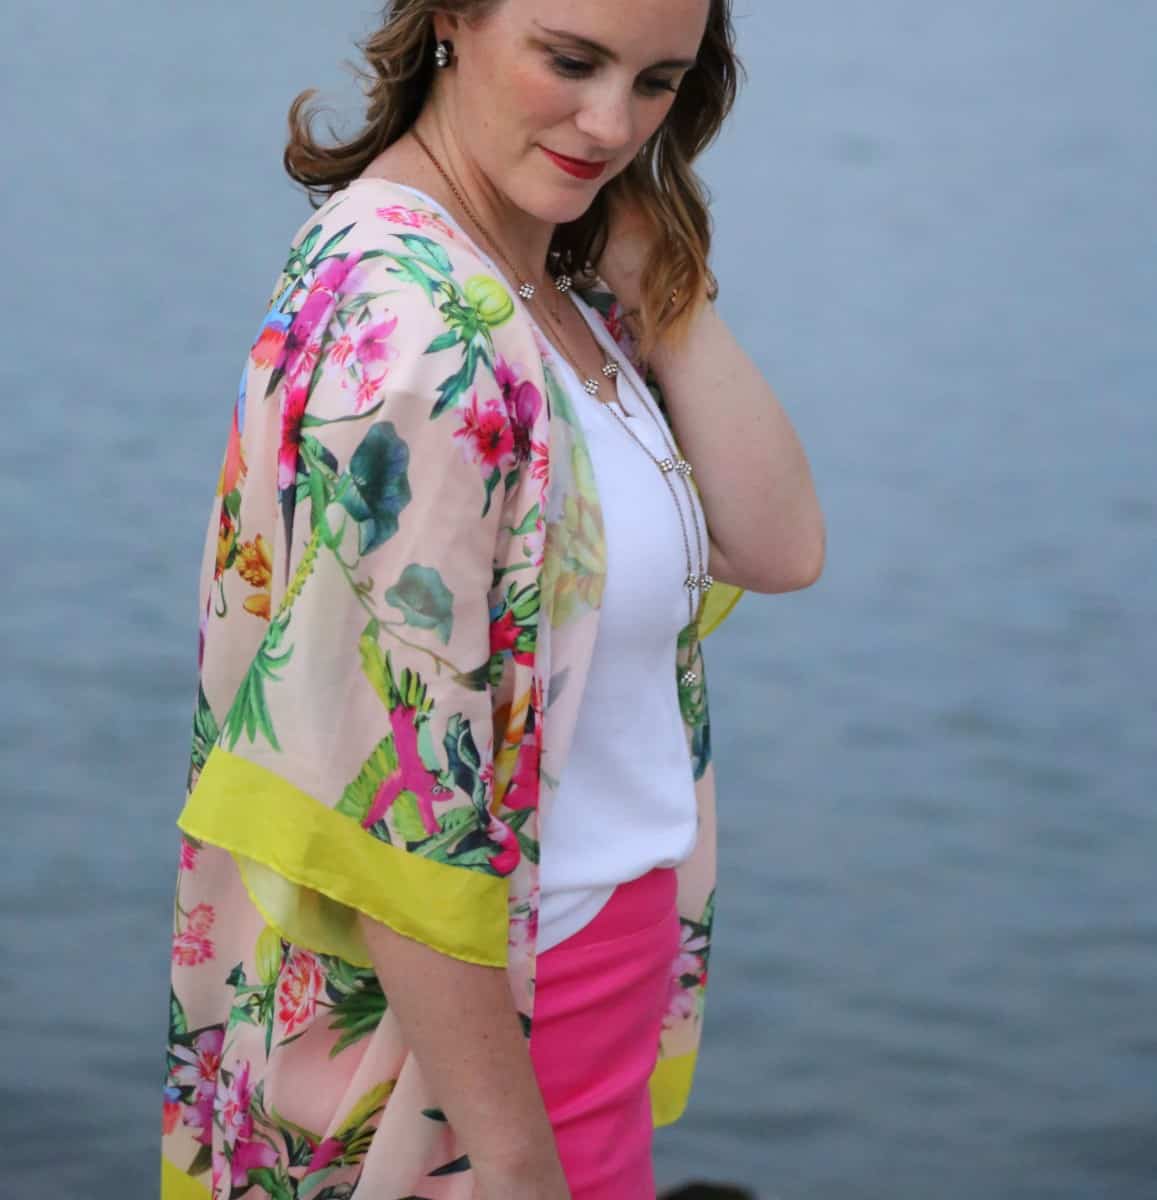
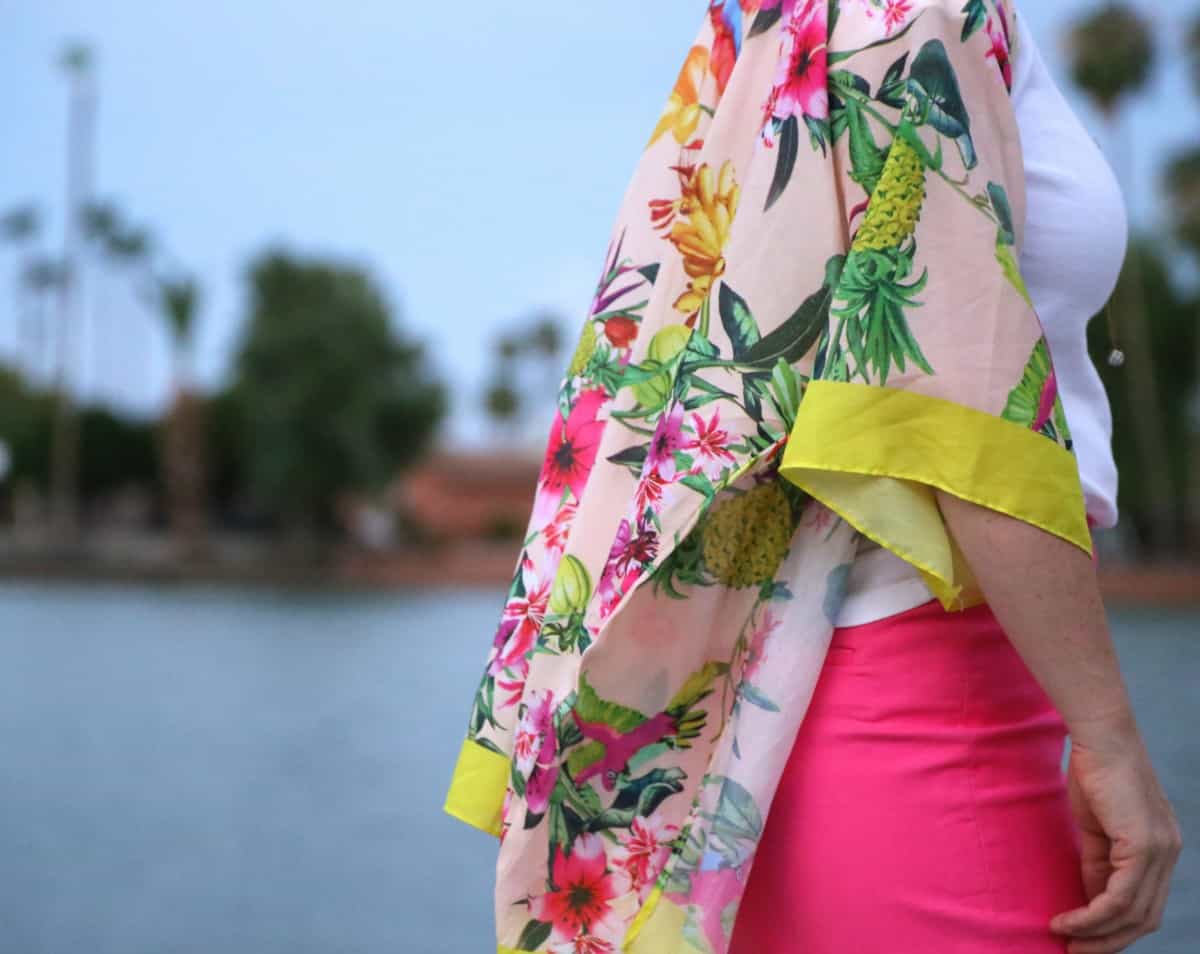
This tropical kimono started out as a scarf from H&M. I loved the colors and print so much I just had to have it…but we only need to wear scarves here about 2 days out of the year (yes, even thin ones are suffocating!). So alas, another kimono.
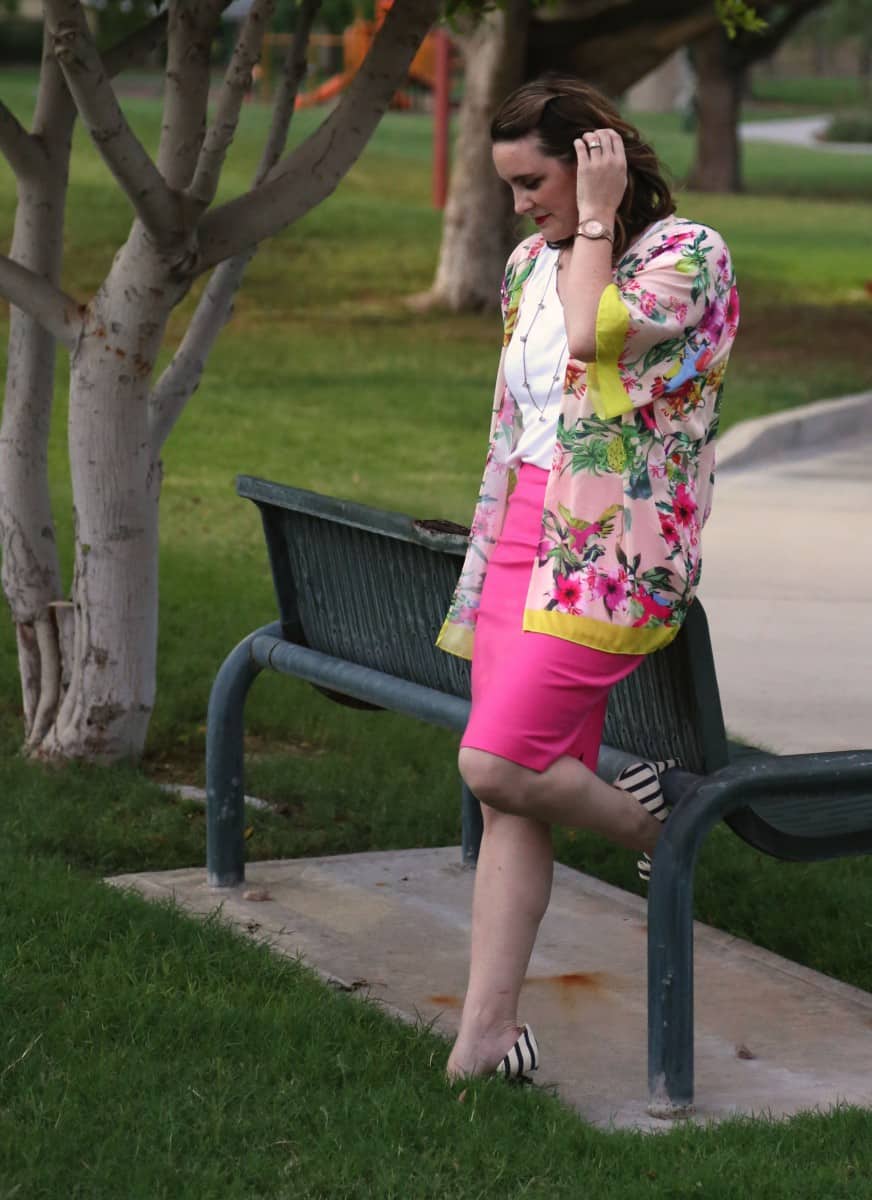
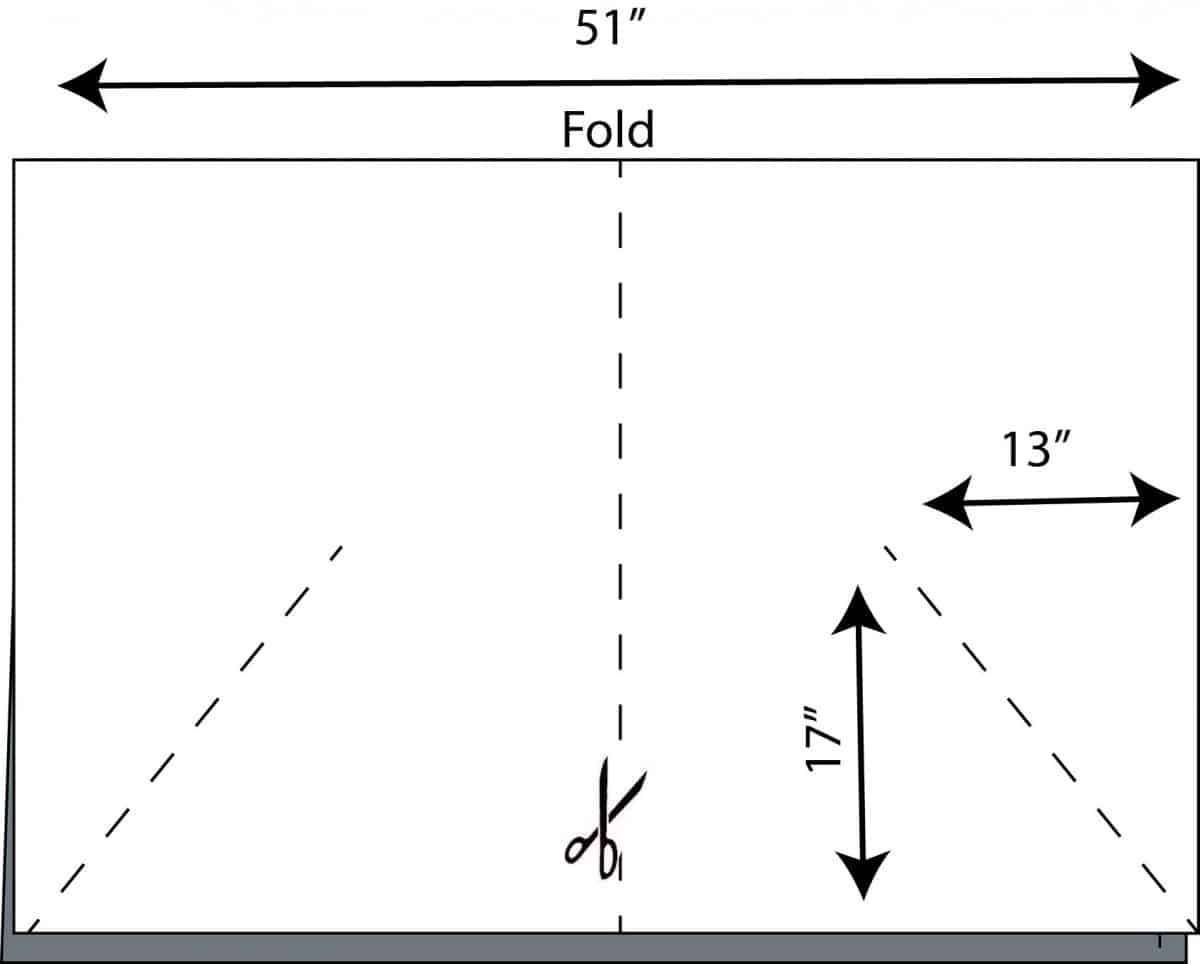
The original scarf measured 51″ x 58″. I folded it in half widthwise and then cut down the center of the front. I then stitched up the sides (wrong sides together) at a 45 degree angle from the bottom corners, towards where the armpit would be. When I tried it on like this, I really liked the flow and the extra fabric at the sides…unfortunately, it was just too much fabric on my 5’5″ frame. I wanted to shorten just the sleeves but still keep the neon yellow trim.
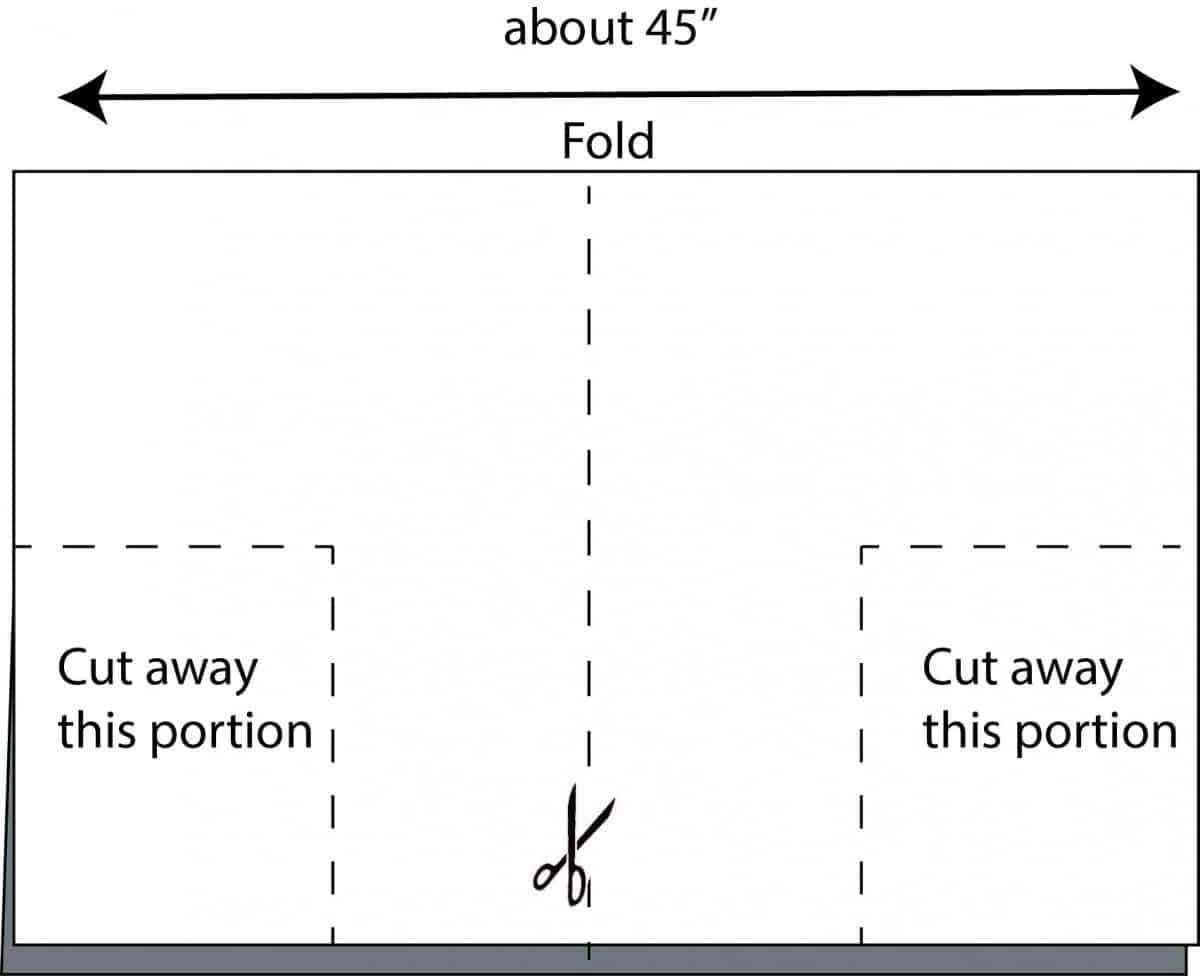
After messing around with it for a bit, I finally decided to cut up the center of the back and take it in. I also took out the underarm stitching, flipped it right sides together, and just sewed a right angle up the sides and under the arm (see below). Then I cut out the extra fabric under the arms.
In short, two totally different ways to get basically the same thing: a cute flowy layer to wear with any and everything.
I can’t wait to experiment with heavier knit kimonos this fall and winter!
6 Comments
Kim Coffin
March 9, 2017 at 2:44 pmHow am I just now seeing this post? Your kimonos are gorgeous!!!
Bonnie
March 9, 2017 at 3:45 pmThank you Kim! And the comfort factor cannot be beat 😉
Betsy
May 2, 2018 at 4:36 pmThis is adorable!! How did you do the neckline?
Bonnie
May 6, 2018 at 3:08 pmThanks Betsy! On the knit one I just left a raw edge! The woven one I used a double fold hem. Hope that helps!
Betsy
May 6, 2018 at 5:47 pmDid you just cut straight up the center or did you widen it at the top for the neck?
30 Free Kimono Pattern to Sew - DIY Crafts
November 29, 2022 at 11:56 pm[…] Are you having a big craze for kimono fashion? Sew this stylish design pattern of kimono, will rock for summer fashion. Pair it up with the pencil skirts for getting adorably cute and stylish looks. Use any lightweight floral fabric to sew this crazy kimono design and add the accent yellow border trim. Details here bonnieandblithe […]